

Before telling you about this DIY Dollar Tree Wall Chalkboard Planner for Under $10 we gotta go to that good ol’ disclaimer: Housevegan.com is a participant in the Amazon Services LLC Associates Program, an affiliate advertising program designed to provide a means for sites to earn advertising fees by advertising and linking to Amazon.com. This post contains Amazon affiliate links.
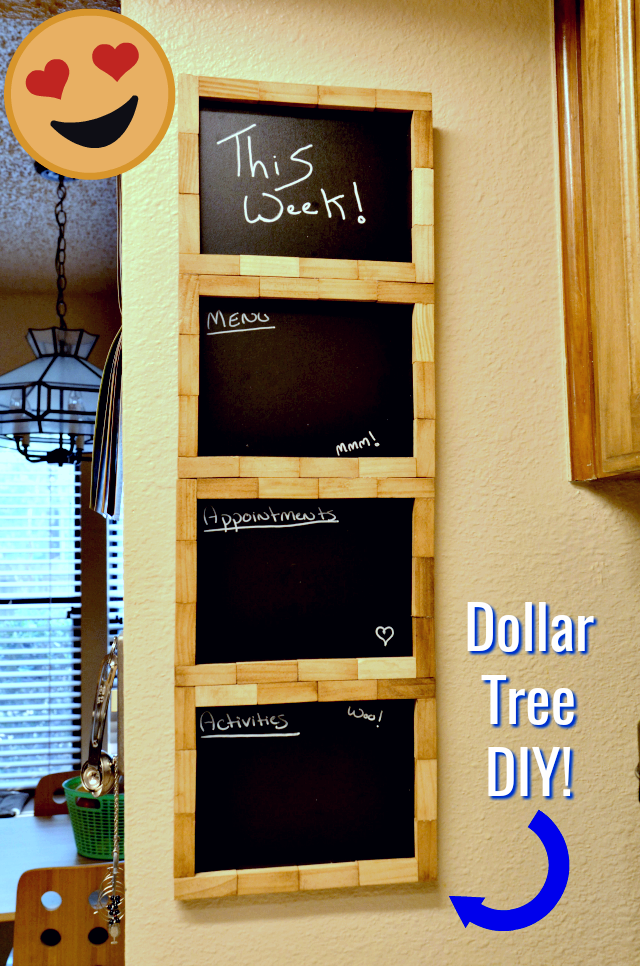
How cute is this Wall Chalkboard Planner? Here’s the deal: I love to craft and I love to decorate our home with awesome DIYs on a budget. The only thing is, I’m not a natural crafter. Some people have craft rooms and supply budgets and patience. I have none of those things. I have a smallish box of supplies and a low tolerance for projects with a million precise steps.
I know a craft post is totally different from what I normally do, but I want to bring y’all into my life. I do more than eat, and I have lots that I want to share with you!
So although I’m not an expert crafter, I want to occasionally bring you along for the ride. Which, by the way, will almost always include:
- Lots of mistakes
- Stuff from Dollar Tree
- Confusing “action” pics
- Me taking shortcuts, likely regretting it, and then possibly doing it over
- Hot glue burns
- Overbuying materials
- Beaming childlike smiles for the masterpiece made
This DIY is a great example of all these things. Especially #5. I didn’t take a picture of the burn, but let’s just say that blistering occurred.
Jay Munee DIY on YouTube is the genius behind this project. I’ve linked to her social media below, and definitely recommend checking her out. Her DIYs are pretty incredible!
I followed her tutorial for this almost exactly. Some changes I made included:
I followed her tutorial for this almost exactly. Some changes I made included:
- Leaving off the hooks
- Making the piece vertical
- Coffee staining the wood
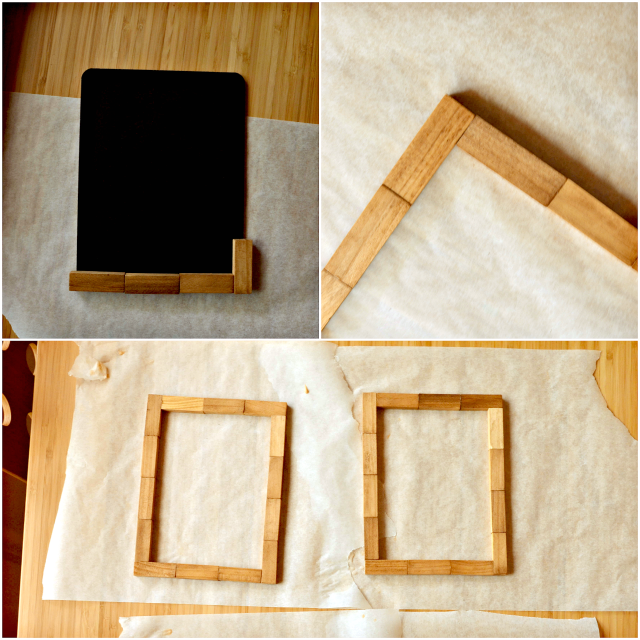
Oh speaking of coffee staining the wood, did you notice that beautiful stain up there? The left piece is untouched, and the right piece was soaked in coffee grounds for 2 hours. Not bad considering I was too lazy to buy actual wood stain. (Step 4: Me taking shortcuts).
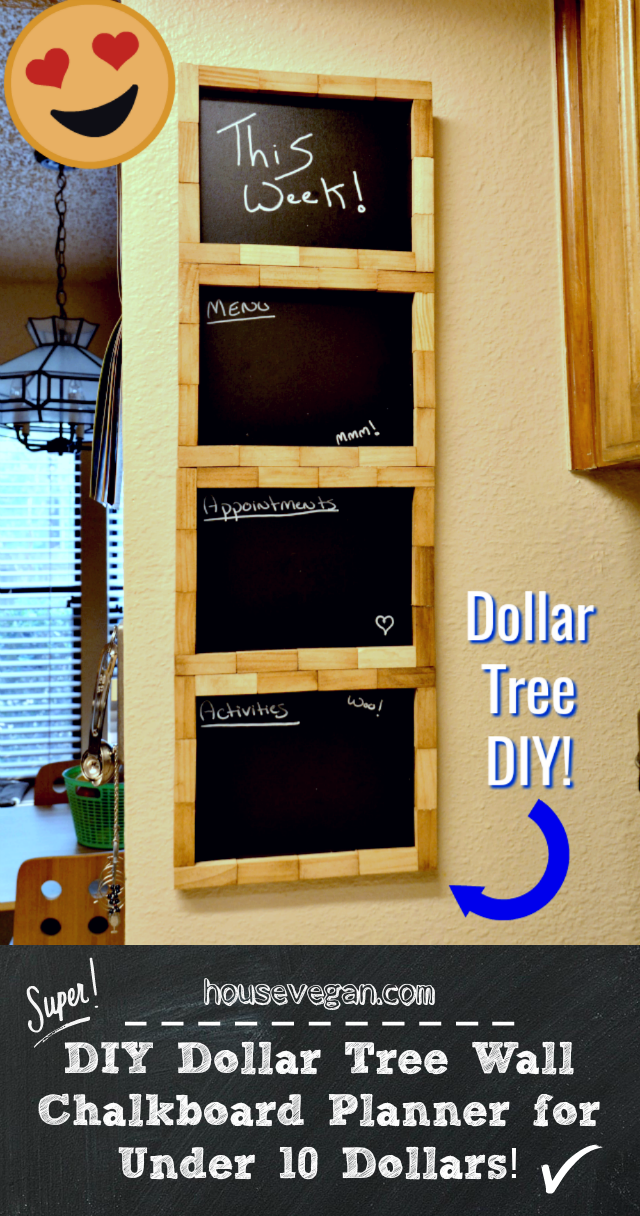
As far as DIYs go, this was simple and fun, and the result looks really beautiful and high-end. Only it’s not high-end at all. Every piece of material was bought at Dollar Tree. Dollar Tree! I love that store. And aside from the time it took to stain and air-dry the wood pieces, it came together really quickly.
I’ll let you go to Jay’s channel for the tutorial, but I’ll tell you how I stained the wood. I’m not even going to make a project card because, frankly, crafting with me is often loosey-goosey. Let’s keep this authentic.
Step 1: Combine 4 cups of warm water and 1 1/2 cups of ground coffee in a large bowl.
Step 2: Add the wood blocks.
Step 3: Cover the blocks with a plate to make sure they are completely submerged. Let the pieces soak for at least two hours or longer depending on how dark you want them to be.
Step 4: Remove the blocks from the coffee, and allow them to air dry overnight. Do not use until they are completely dry. You’ll need to wipe off some grounds too. This is easier to do when the wood is dry.
Step 5: Discard the coffee and water mixture.
DONE.
This tip is definitely going to come in handy for future projects. The Dollar Tree Tumbling Tower Game (aka Dollar Tree’s tiny version of Jenga) is excellent for crafting, but the odds of me ever going out of my way to buy wood stain are slim. Cheap coffee though? Easy.
Be sure to check out Jay if you like crafting on the cheap!
YouTube: JayMunee | Instagram: peebeenjay
Pin It
Let’s be friends! Follow HV on Facebook, Pinterest, Bloglovin’ & Instagram